How to Grow Purslane Microgreens in a Container
Summer purslane (Portulaca oleracea), best known as a vigorously-growing weed, can also be grown as a leafy vegetable in gardens or as a microgreen in containers. In this article, we focus on tips and tricks that can help you successfully grow your first crop of purslane microgreens in a container, indoors or out. Purslane microgreens are commonly used to add tangy flavor and juicy texture to salads, rice dishes, stir-fries, and soups. They also supply a whole slew of nutrients and share many of the health benefits of mature purslane.
In some respects, purslane microgreens may have even more nutritional value than their mature counterparts. One study found that the antioxidant capacity of purslane was 24% stronger in 15-day old microgreens than in 60-day old mature plants. This phenomenon is true for many other plants as well. If you're interested in learning more about how other microgreens compare to their mature counterparts, check out our in-depth article on the health benefits and nutritional value of microgreens.
But now, let's get down to business and take a look at the steps you should follow in order to grow a successful crop of purslane microgreens in a container.Step 1: Buy purslane seeds and sow them
You can buy purslane seeds from Amazon here (affiliate link). Next, fill an empty container with drainage holes punched in the bottom with organic potting soil, and sow the seeds by scattering them evenly over the soil.
Step 2: Place the container on a sunny windowsill
Place the container filled with the soil and newly sown purslane seeds on a sunny windowsill (you can also place the container in a sunny spot outdoors, if you wish). In order to produce a good crop, purslane microgreens need several hours direct sun light every day. If you fear your budding microgreens won't get enough natural sunlight, consider buying a grow light designed for growing seedlings.
Step 3: Keep the soil moist but avoid overwatering
Water the sprouting purslane seedlings as needed. The best way to keep your indoor microgreen garden moist (but not overly wet) is to use a spray bottle or bottom-watering. If you're not familiar with bottom-watering, this is how it's done: Fill a large tray with water, place the purslane container in the tray, and let the soil absorb water through the drainage holes punched in the bottom of the container.
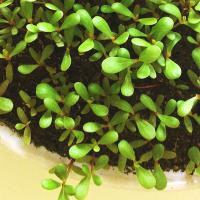
Step 4: Harvest your summer purslane microgreens
When the purslane microgreens are a few inches tall, harvest them by snipping them with a pair of sharp kitchen shears. Note that purslane microgreens start to lose their nutritional value immediately after harvest, so it is best them serve and eat them as soon as possible. If you must store them, wrap them in a moist paper towel and store in a plastic bag in the crisper section of your refrigerator.
What's next?
Once you've harvested and eaten all your purslane microgreens, start a new crop. Sow new purslane seeds or experiment with other microgreens and baby greens. Other easy-to-grow miniature greens include sunflower shoots, broccoli microgreens, snow pea shoots, and radish microgreens.